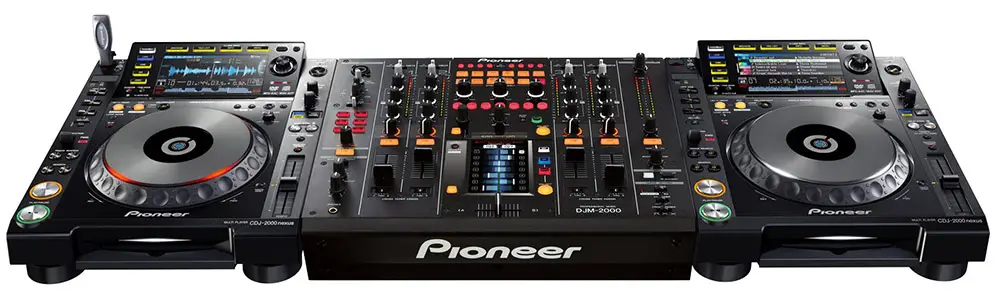
How to Set Up CDJs and Mixer
What DJ setup has become the benchmark of the professional industry? Really, there’s only one answer to this question; the CDJ and mixer setup.
CDJs are becoming the deck of choice for both pros and the masses, vinyl has done its stint for long enough – let’s face it – around 50 years or more is long enough! The digital generation has now taken over and 3 main options have vyed for the number 1 spot; DVS, CDJs, and controllers.
They all have their place in the rooms, studios, venues, hearts, and minds of DJs and those in the music industry but the CDJ and mixer setup has become the number one pro setup and most commonly found in-house DJ equipment. If you want to learn on a setup which you’ll find in venues then learning on a CDJ setup is the best course of action.
Yes, controllers are also extremely popular and plugging them into venue setups is getting easier but being able to turn up and mix straight on the in-house setup would be an asset to your DJ skills.
Why?
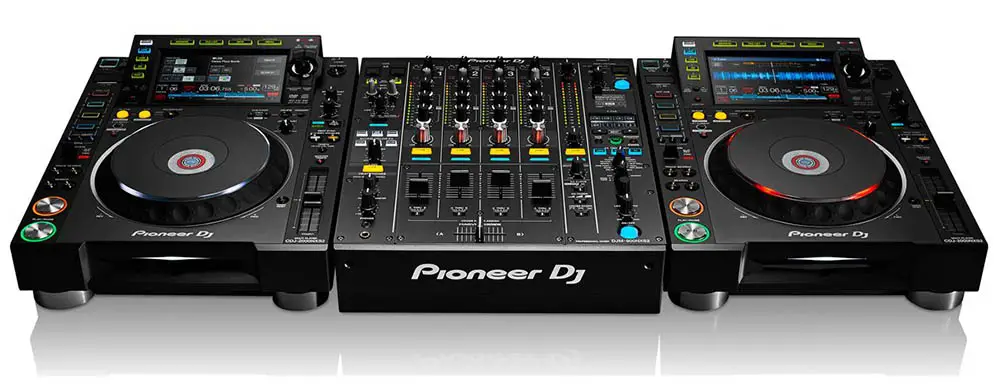
CDJs are no longer just the glorified CD players that they used to be. Yes, you can still use actual CDs with the most high-tech top-end CDJs but CDJs pretty much revolve around USB now. The vast majority of DJs have digital databases of tunes held on USB sticks, it’s easy, cheap and you can carry huge selections of thousands of tunes. USB sticks also allow DJs to organize their music easily and clearly.
CDJs are therefore usually used in conjunction with a USB stick. In the case of Pioneer CDJs, this USB will be prepared on RekordBox where you can organize your library into sets and playlists, add hot cues to your tracks and test them in the software to make sure everything sounds as you expect it to. This gives you unparalleled flexibility, you can get your set ready before hitting a gig, etc, offering enormous peace of mind.
Aside from their USB functionality, CDJs are also great to use and have many unique features that set them aside from vinyl decks, controllers or DVS setups. Controllers are most closely matched in the feature department as you have access to FX, cue buttons and FX controls but overall, these are easier to operate from CDJs.

CDJs have many controls including:
Looping: For looping parts of your track to either stall a buildup, buy time to mix a track, creatively build up a track or to buy yourself time to solve an issue or find a new track.
Cue: Cues come in two different forms, the main cue button positioned next to the play button on the deck or the hot cues. The main cue button allows you to count in and cue the tune you’re dropping whereas the hot cues allow you to skip and navigate to a point in the track which you’ve previously marked with a cue point.
The LCD Display: CDJ LCD displays bring key information about your tracks to the fore. These include:
- The track position and duration
- Any hot cues loaded onto the track
- The BPM
- The waveform
- The music library and access to playlists, folders, and tracks
Obviously this varies between CDJ to CDJ, only Pioneer Nexus have the full waveform display complete with hot cues.
Settings control: CDJs are easily modified to fit your needs and can be altered with regard to their functionality and operation. E.g. you can change the feel of the jog wheel and whether you want it to feel more like vinyl or not.
Why Always Pioneer?
You might be wondering why all talk about CDJs revolves around Pioneer. Well, Pioneer is the undisputed leader of CDJs and very few other manufacturers are even worth discussing in regards to CDJs (sorry other manufacturers!).
Denon has made some good CDJs and Numark have produced some cheaper CDJs but Pioneer’s monopoly over the CDJ market is enormous and formidable. You won’t find clubs and venues with CDJs that aren’t made by Pioneer because people simply aren’t used to them.
Also, RekordBox combines with Pioneer’s CDJs to streamline the whole process of preparing tunes and mixing on CDJs. RekordBox is Pioneers’ software.
How to Connect CDJs to a DJ Mixer
When we’re connecting up our equipment to mix, one of the first basic steps is to plug in your decks. Decks are simple to plugin and as it stands, they all use the same cables: RCAs.
RCAs are simple cables that haven’t really been usurped by anything better yet, they’re cheap and easy to get hold of. The only other cable you need is an AC power cable, often referred to as a figure of 8 cable. These may vary depending on your mains power.
RCAs connect from your CDJs into the mixer’s LINE input. This is very important as connecting them into the phono input won’t work properly. Also, many mixers have a switch you have to depress to set the mixer to LINE input. Line inputs are commonly used digital devices, vinyl decks, on the other hand, connect into the PHONO input which is designed to handle lower-level analog sources.
Linking CDJs
The only other connector to worry about is your link cable. CDJs need to be linked together so they can ‘talk’ to each other, without this you’d need two USBs or SD cards and your CDJs wouldn’t work in-sync with each other. Again, this requires a simple connector; an ethernet cable. For simple two-deck setups this cable plugs between the two decks. Easy!
Linking decks has a number of other advantages – the link service is actually called Pro DJ Link and it allows you to:
- Connect your decks together to share storage, e.g. USB or SD card. This actually extends to 5 players and not 4!
- Share the BPM and beat position to the ‘master’ deck of the chain. This isn’t often necessary but it suits DJs looking for large synced up setups.
- Connect to your PC running RekordBox. You can then load music into your storage wired or wirelessly.
- Sync to a DJM mixer FX module.
- Connect to a phone or tablet enabling you to load music from there. This is also an often-forgotten feature which can be very useful.
- Share your sets to the KUVO service.
- Connect to third-party apps, e.g. Ableton Live.
If you have more than 2 decks
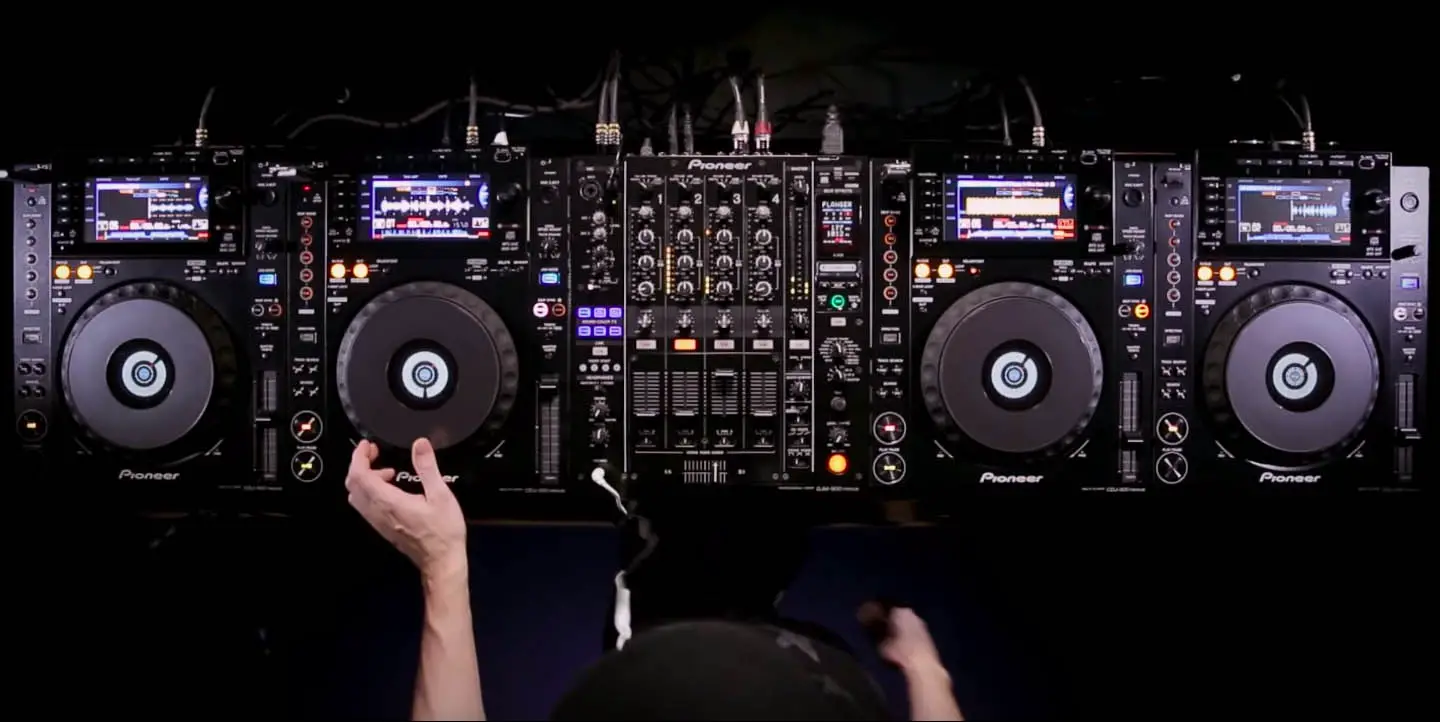
If you have more than 2 decks then you’ll need a link box to link all the CDJs together. You can use a normal router for this, provided it has as many ethernet inputs as you need up to 5. Simply connect an ethernet cable from each deck and one from your DJM-enabled mixer if it has one to link the entire setup.
Numbering the Decks
For larger setups, you’ll want your decks chronologically numbered 1 – 4. You’ll have to enter the Utility Menu on a deck and scroll to “Player No” to select the number you want to designate the deck to. This isn’t necessary for 2-deck setups.
Make sure no storage device is connected when you try to do this or else it won’t work properly.
The DJ Mixer
The DJ mixer is a more straightforward bit of kit in most respects. It has a simple job, it takes audio signals from external sources, mixes them together and then outputs them to a speaker system.
DJ mixers are sorted by their number of channels. The minimum is 2 (you can’t do a 1-deck mix after all…!) and the maximum exceeds 6, 8 or even 12+! Typical mixers have either 2 or 4 channels, though.
Once you’ve connected your decks into your mixer with your RCAs, it’s time to connect your outputs. You’ll commonly use two outputs, the master or main out and the booth or monitor out. The master or main out connects to your main sound system whilst the booth or monitor out connects to your monitor speakers. They might have a 3rd output named REC for plugging into recording devices.
Outputs use any of 3 types of cables:
- RCA – for smaller, older or less expensive mixers
- XLR – for larger and more expensive mixers
- TRS/Jack – typically only used for monitor/booth outs
The cable you need depends on your system. A smaller sound system that uses powered speakers may simply require an RCA converted to TRS. RCA > TRS would suit a setup that uses powered monitor speakers, e.g. KRK Rokits. XLRs run into amp racks or DSPs (digital speaker processors) for bigger setups. TRS, as said, typically run into monitor speakers or PA speakers.
Setting the Mixer
All connected? Awesome!
Now, you’ve got to tweak a few things on the mixer to set it up properly for mixing.
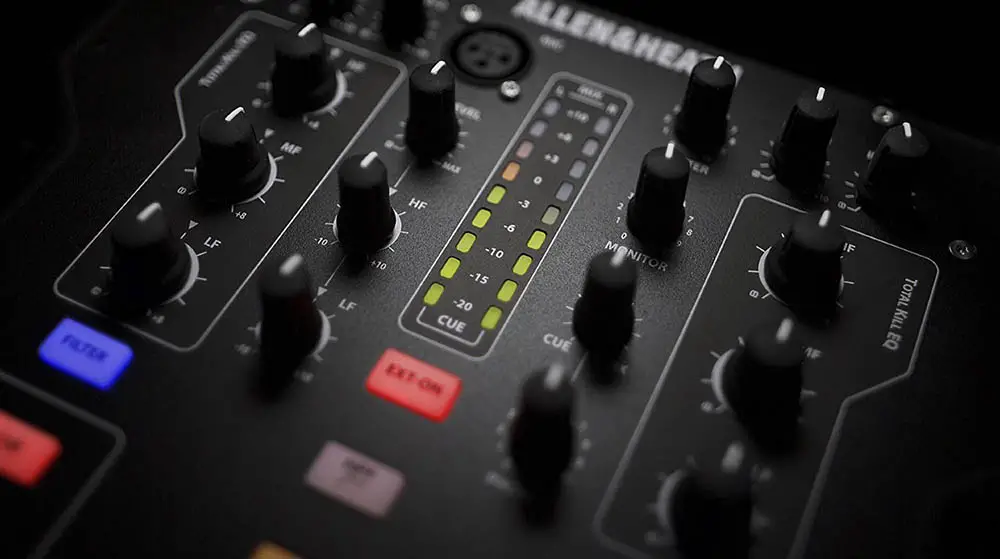
Gains: Gain controls are the small knobs that sit above each channel. Gains are used to properly set the volume levels so you’re:
- Not overloading the channel
- Overcompensating by turning up the speakers
If your gain is too low, you’ll have to crank your speakers too much. If your gain is too high, you’ll clip the channel.
DO NOT REDLINE THE CHANNELS!
By turning gains up unnecessarily, you’ll clip your channels and redline them. Redlining will probably result in the sound engineer tapping you on the shoulder and turning your gains back down again. Redlining a channel means it’ll distort and clip which will make your mix sound squashed and rubbish. If you want to turn things up, turn them up on your amps or speakers.
The ONLY time you should touch the gain is to adjust tunes which are particularly quiet. E.g. if you’re mixing modern techno and then you want to mix in a classic tech house track from the 90s then you’ll want to turn it up a bit or it’ll sound very quiet and underpowered. When you do this, make sure you turn the gain back down again before loading a louder tune.
The Crossfader: If you’re a crossfader user, you’ll want to assign it to the decks you want to control in the case of mixers with 3 or more channels. You can also set the crossfader fade settings.
Troubleshooting
Problems aren’t just a possibility, they’re an inevitability! DJ setups aren’t so simple when you’re using high-tech digital gear and issues do occur. Back in the day of vinyl and analog equipment, troubleshooting would be much simpler but now, there is simply more to go wrong!
That said, issues are still rare and you’ll usually find everything works perfectly when you switch it on. If it doesn’t then check the following:
Cables and Connections: When you forget to plug in a cable it’s called an ‘air-gap’, a term that is less embarrassing to shout out compared to ‘I forgot to plug it in!’ Seriously though, this is the first thing you should check. Cables that are blatantly missing are easy to spot but sometimes cables will be damaged and this is very problematic to spot. It’s best to test all your cables ahead of a gig set up to make sure they work correctly and then, you won’t need to worry about your cables at a gig in the event of a problem.
Deck Settings: Assessing your deck settings is vital if you’re linking 3 or more decks with a router. You should also check your router operation lights to see if the ethernet cables are working correctly. In Utility Menu, you’ll have to make sure your decks are set to different numbers or else a ‘Deck Conflict’ error message might show.
Mixer Settings: Make sure your gains are turned up, mute buttons are turned off, crossfader is assigned correctly and channel faders are adjusted correctly. If you’re getting signal through and it’s correctly appearing on the meters of the right channels then your issue is likely to do with your output.
You may also like: